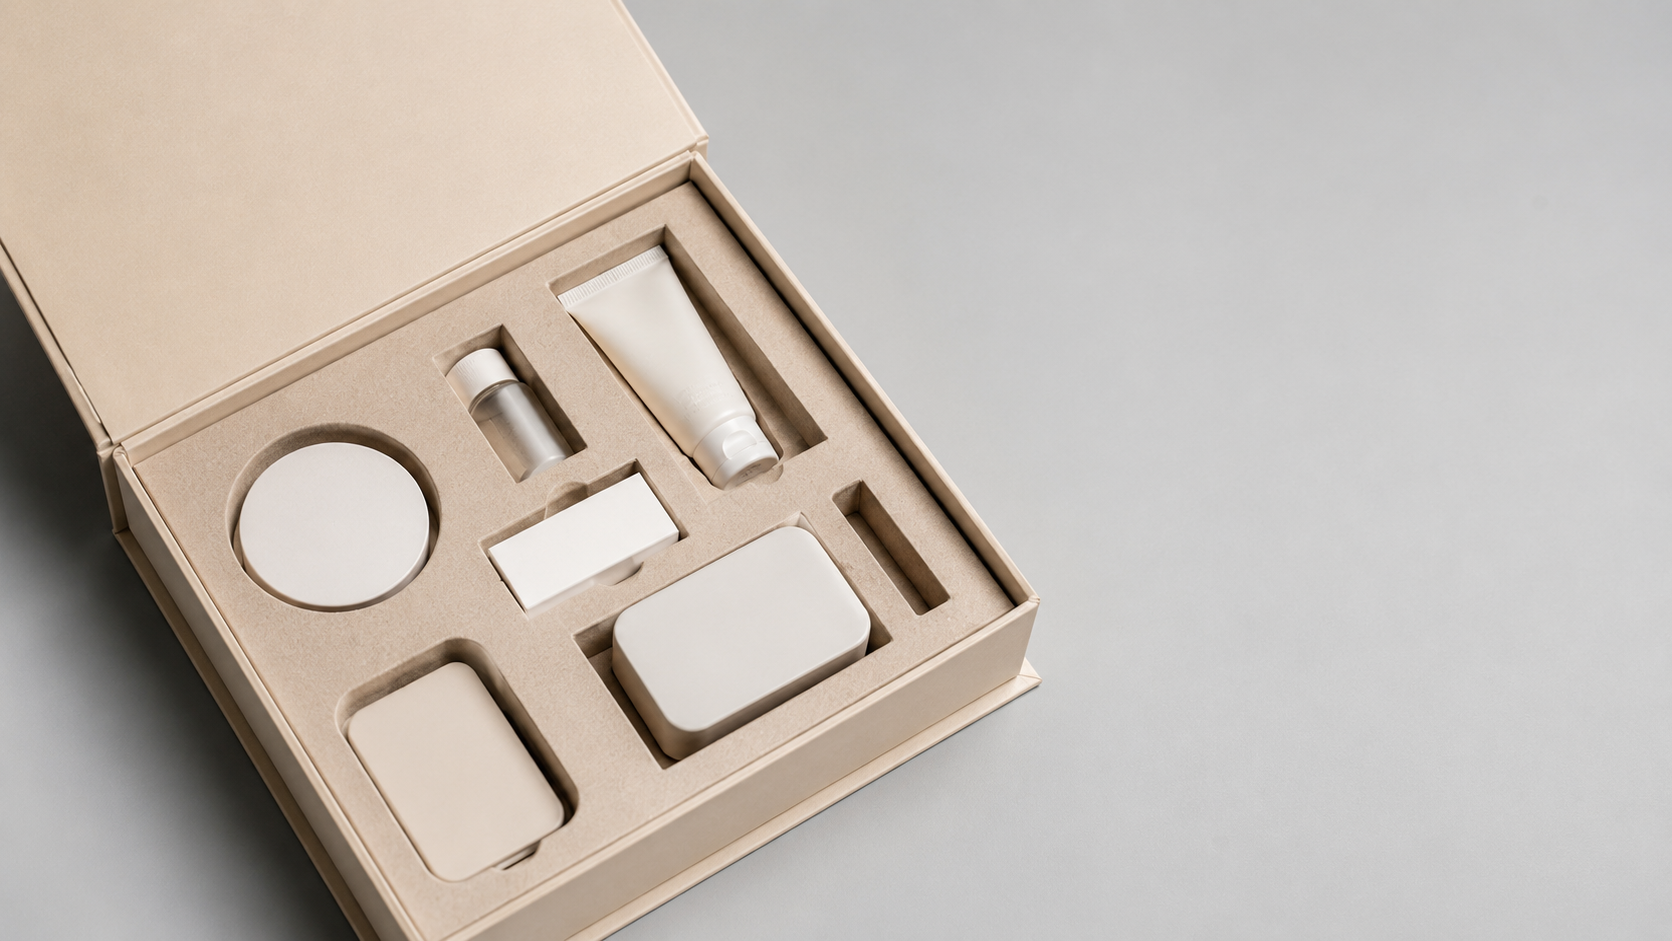
A box insert does two jobs at once: it protects whatever is inside during transit and handling, and it presents the contents in an organised, deliberate way when the box is opened. Getting the insert design wrong usually shows up as either damaged products or a box that feels cluttered and unplanned.
Start from the product, not the box
An insert should be designed around the exact shape, weight and fragility of what it's holding, rather than fitted into a box that was chosen first. Measuring each component precisely, including any awkward shapes or asymmetric parts, prevents an insert that looks right on paper but leaves gaps or pressure points once the real product sits inside.
This is especially important for multi-part products, where each component may need its own cavity depth and shape. A single flat insert rarely handles a set of pieces with different heights and footprints as well as a insert designed cavity by cavity.
- Measure each product component precisely, including irregular shapes.
- Design cavity depth and shape individually for multi-part products.
- Avoid choosing the box first and forcing the insert to fit afterward.
- Account for any product component that's noticeably heavier or more fragile than the rest.
Choose an insert material based on the fragility level
Die-cut cardboard or kappa inserts work well for products that need organisation and light cushioning but aren't highly fragile, offering a cost-effective way to keep components separated and presented cleanly. Moulded pulp inserts add more cushioning and a premium, considered feel, and work well for mid-weight fragile items.
Foam inserts, either die-cut or moulded, offer the highest level of shock protection and are generally reserved for genuinely fragile items such as glassware, electronics or precision components, since the added material and tooling cost is harder to justify for items that aren't actually at risk of damage in transit.
- Use die-cut cardboard or kappa inserts for organisation with light cushioning.
- Use moulded pulp inserts for mid-weight fragile items needing more cushioning.
- Reserve foam inserts for genuinely fragile items like glass or electronics.
- Match material choice to actual fragility risk rather than defaulting to the most protective option.
Design cavities with a small, deliberate tolerance
A cavity cut to the exact size of the product often causes as many problems as one that's too loose, since a product can be difficult to remove without damaging the insert, and manufacturing variation in the insert material itself can make an exact-fit cavity too tight in practice. A small, deliberate tolerance, just enough to allow the product to sit snugly without forcing it in or out, usually performs better than a zero-tolerance fit.
For multi-part products, it also helps to design cavities so that pieces can only be placed correctly, using shape cues rather than relying on a label or diagram to guide reassembly or repacking.
- Add a small, deliberate tolerance rather than cutting cavities to an exact fit.
- Avoid zero-tolerance cavities, which can trap products or crack under manufacturing variation.
- Design cavity shapes so multi-part products can only be placed correctly.
- Test insert and product fit with a physical sample before finalising the die-line.
Balance protection with assembly time
An insert with many separate pieces or a complex fold pattern can offer excellent protection but slow down packing significantly at scale, particularly for orders that are hand-assembled. It's worth weighing the marginal protection benefit of a more complex insert against the added labour time and error risk of a more complicated assembly process.
A simpler insert with fewer pieces, well-designed cavities and a clear assembly order is often the more practical choice for larger production runs, reserving highly complex, multi-piece inserts for smaller runs or higher-value products where the extra time is easier to justify.
- Weigh insert complexity against packing time at the expected order volume.
- Prefer simpler, fewer-piece inserts for large-scale, hand-assembled orders.
- Reserve complex, multi-piece inserts for smaller runs or higher-value products.
- Document a clear assembly order for anyone packing the insert at scale.
Test the full assembly under real shipping conditions
An insert that performs well on a stationary desk can behave differently once the box is stacked, shaken or dropped during actual transit, so it's worth testing the fully assembled box, insert and product together rather than judging the insert in isolation.
This is particularly important for multi-part products, where individual pieces can shift against each other during transit even if each cavity holds its own component securely. A short transit simulation or drop test on a sample can catch this kind of interaction before a full production run is committed.
- Test the fully assembled box, insert and product together, not the insert alone.
- Check for component-to-component movement in multi-part inserts under shaking.
- Run a basic drop or transit simulation on a sample before full production.
- Adjust cavity tolerances based on the test results rather than the original design assumption.
Common questions
What insert material is best for fragile items like glass or electronics?
Foam inserts, either die-cut or moulded, generally offer the best shock protection and are typically reserved for genuinely fragile items where the added cost is justified by the risk of damage.
Should a box insert be cut to the exact size of the product?
A small, deliberate tolerance usually works better than an exact-fit cavity, since manufacturing variation and the need to remove the product without damage can make a zero-tolerance fit impractical.
How do I keep multi-part product inserts easy to assemble at scale?
Favour simpler inserts with fewer pieces and cavities designed so components can only fit correctly. Reserve highly complex, multi-piece inserts for smaller runs or higher-value products.